1970 A Body Chevelle Body Mounting Bolt Removal
Any one who has seen the process or lived through the process knows just how hard it is to remove the bolts that attach the body of a Chevelle to the frame.
Here are the locations:

Now let's go through each of them and see how it is possible to remove these bolts if they are (1) seized, (2) simply spinning without coming out. Of course in a perfect world they would all just come right out with a 7/16"" impact socket and a 1/2" impact wrench.
There are 5 bolts on each side of the car, 6 if it is a convertible. There are also 2 locations that have bushings but no bolts, labeled "8" in the picture above. These bolts are held in place by a square nut that is placed within a steel "cage" to prevent the nut from spinning when tightening or loosening the bolt. The problem with this design is if the cage is rusted it will not hold the nut in place allowing the nut to just spin, unable to for the bolt to be removed.
The first bolt is at the front of the frame by the radiator. It is easy to access, see and remove. These are typically in relatively good shape and come out without too much effort.
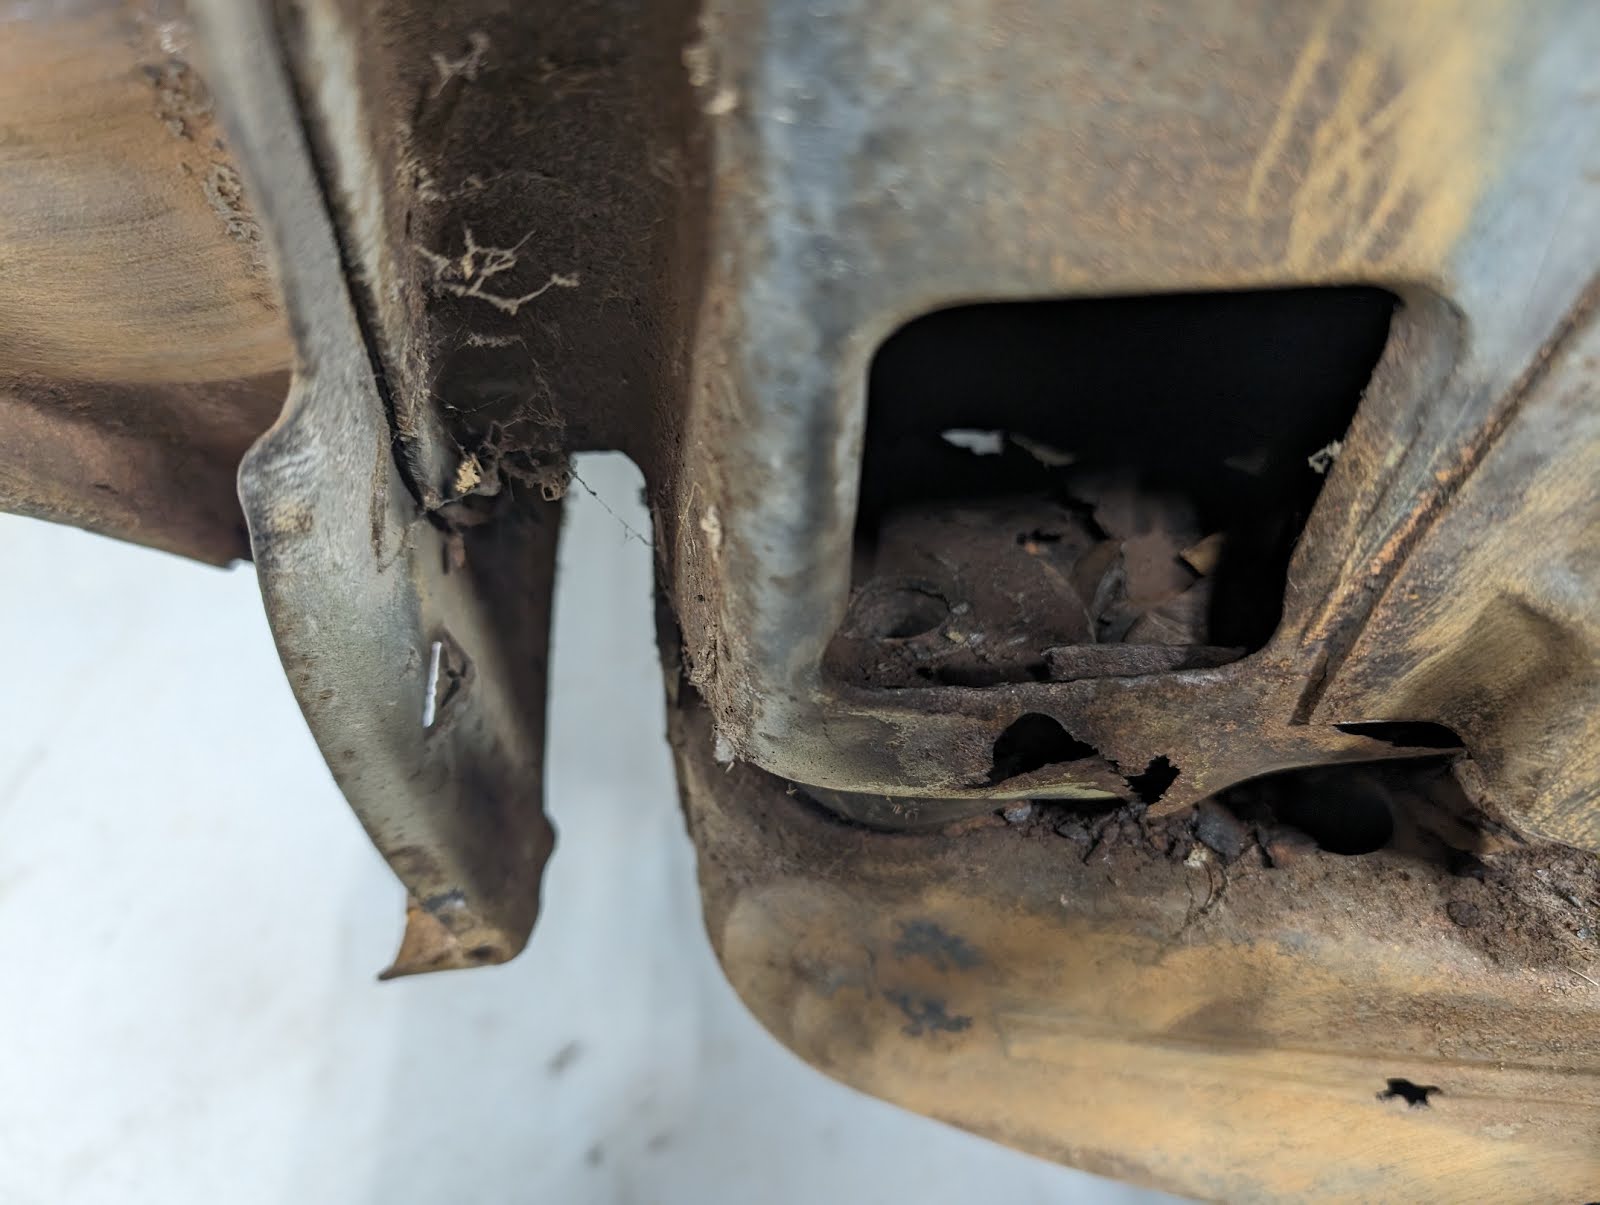
The second bolt is within the cowl section at the bottom of the firewall:
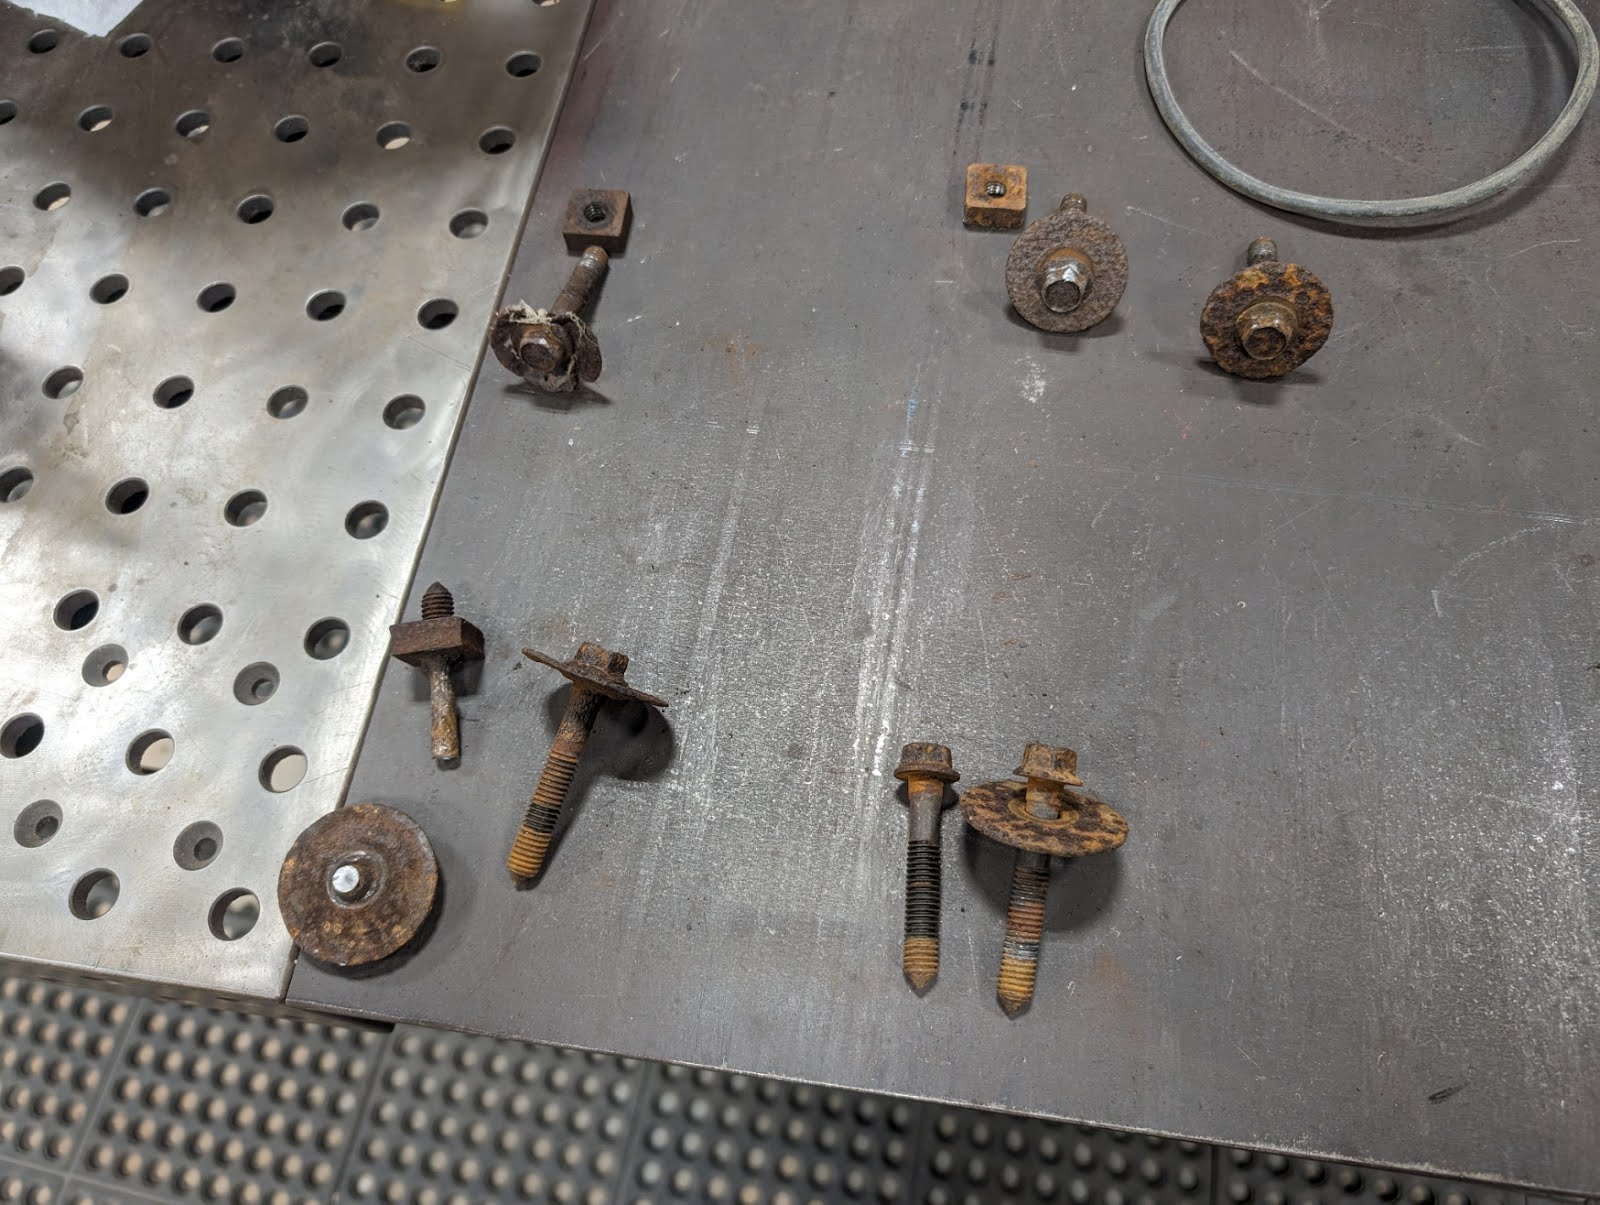
The image shows all of the bolts that came out, one was stuck within the frame due to the fact that the washer had rust-welded to the bolt and would not fit through the hole in the frame:

These are the holes at the bottom of the frame which provide access to the bolts from below.
The biggest problem is when the cage is rusted and the bolt simply spins when you try to remove the bolt. When this happens there is only one thing that can be done to remove the bolt and that is to cut into the body until you get to the nut cage and nut in order to hold it in place so the bolt can be removed.

So for me one of the bolts that was under the trunk was spinning as well as one under the back seat...not fun.
So to locate where I needed to cut from above I drilled a small hole right next to the bushing below the trunk and the back seat all the way into the truck and the back seat so I could have a good idea of where I needed to cut. I started with the truck which had pretty thin metal:


Not too bad. Now for the nightmare under the back seat. First off the drill bit that you use needs to be much longer than a regular drill bit, at least 12". You will be drilling through 3 layers of steel the last of which is a heavy brace under the seat. Start by removing the back seat, then drill your hole. Next use an angle grinder to cut 3 sides of a square then hammer back that piece of metal to reveal the next target. Now you will be drilling a 2" hole with a metal saw bit to reveal the nut cage:


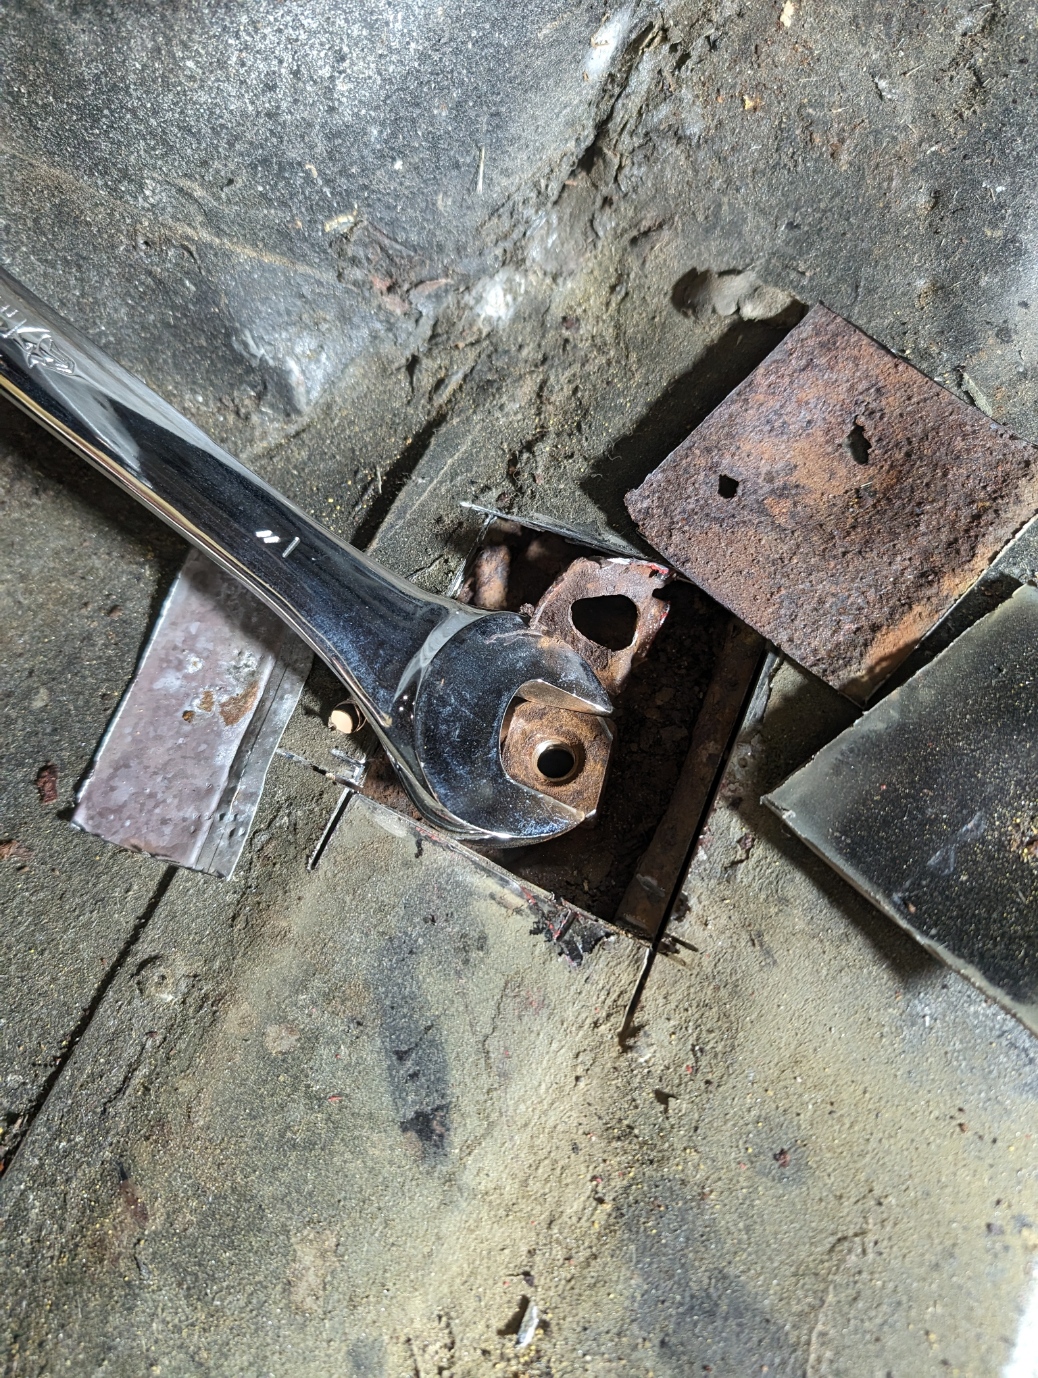
Now chisel back the nut cage and hold the nut with a wrench just like I did in the trunk:

Now you just repeat as needed until all of the bolts are removed. It would be hard to imagine rust issues worse than mine so helpfully you will not have to go to as much trouble :)
Comments
Post a Comment